Tuesday, August 31, 2010
Another angle
That paint on that door panel: Yes, I let the kids help. If Im not mistaken one of the boys ruined a new shirt which did not make Monica happy. The boys have good memories though!
Windshield pulled
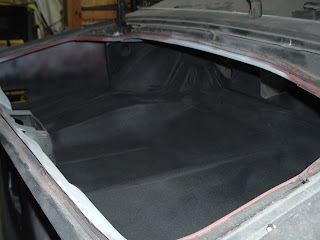
Dave came over and helped me remove the windshield. Thankfully, no rust. Simply sanded and started painting. You can also see that the inside of the car is done and painted. More of my roll on Rustoleum black...
I originally tried to paint with the windshield in but it did not look very good. I was glad I removed the windshield because it ended up cracking (right before I pulled it) and as well, it allowed me to do a thorough job on the dash portion of the cowl.
Tuesday, August 17, 2010
Beautiful
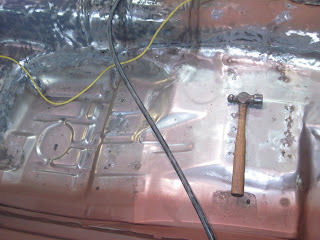
Turned out very nice. As you can see, you can barely tell that the floor pan was weled. You have to be looking for it.
February 25, 2010 What I did on the underside
I did not have Kenny butt weld these panels but instead asked him to weld on top inside the car (which wont be seen) and form a lap joint. What I did so that it did not look like this was done was to grind off the bottom lip that was hanging over with a die grinder. Then, once again it was epoxy time to clean up that seam. I put it on, let it cure, then sanded it down to smooth it all out. The next couple of pics made me happy I did it this way because it turned out very nice.
Rear under seat floor pan area
Knew that this piece was going to have to be replaced. Cut out a piece from a car at the Richwood Junkyard with my friend Dave Havercamp. Kenny had the hang of welding this thin stuff by now. He welded this piece and the drivers toe pan in about 45min.
Drivers side toe pan work.
I did not want to replace this side but after I started grinding, I knew it was going to have to be done. Worked over the sheet metal and called Kenny back over.
Monday, August 16, 2010
That finished toe area
That little corner piece seemed to take forever. Would have been a lot easier with an english roller.
Some more epoxy handiwork. Around the perimeter of the weld, I sanded with the die grinder and then epoxied over the welded joint. When I applied it, I smoothed it out. Once cured, I sanded over it to smooth out the line. Epoxy is much more permanent than filler, thats why I like it. Plus, Im a glue guy!
New toe pan
This is the toe pan I fashioned up with a spare sheet of metal. This one fit like a gem! Be nice if someone made a reproduction...
No floor...
This is a pic from the underside. Even though I had everything cut out, it was still a lot of work getting everything lined up to fit.
1-29-09
Now that the trunk was done and the subframe all painted, it was onto taking care of the rust in the passenger floor pan. More good friends: Kenny Ballenger came over with his welder to begin the work. Freezing cold, some coffee, some Subway, some babysitting of Kennys son Aden, and we got it done.
I cut out the entire passenger side pan and took care of the spot welds using a spot weld bit from Harbor Freight. Some of the best $5 ever spent.
December 2009 Buick 455 gone
Sold the Buick motor for $450.
Its really hard to sell a good running engine that has a lot of new parts on it. Especially when everything is all set up for it in the car. But in keeping with an all Pontiac car- IT HAD TO GO!
Its really hard to sell a good running engine that has a lot of new parts on it. Especially when everything is all set up for it in the car. But in keeping with an all Pontiac car- IT HAD TO GO!
10-29-09 Painted subframe
I used TSC tractor enamel over the Rustoleum Rusty Metal paint (even though it was bare metal). They are both oil based paints so they are compatible with one another.
10-23-09 Subframe is blasted
The Kings and myself did a little blasting today. The core support, subframe, control arms, on my Bird are done. We also did one of Tims frames and some other parts. Big Leroy (the compressor) handled business. Thanks Jenn for the shave with the blaster...
Sunday, August 15, 2010
7-23-09
Pink marked on the diff. Not sure if that signified it was filled, the ratio, or the car it was supposed to go to.
Epoxy action
Sand everything down to bare metal, apply 2 part epoxy, allow to cure. Sand to even out, apply again as necessary. Prime away.
Subscribe to:
Comments (Atom)


